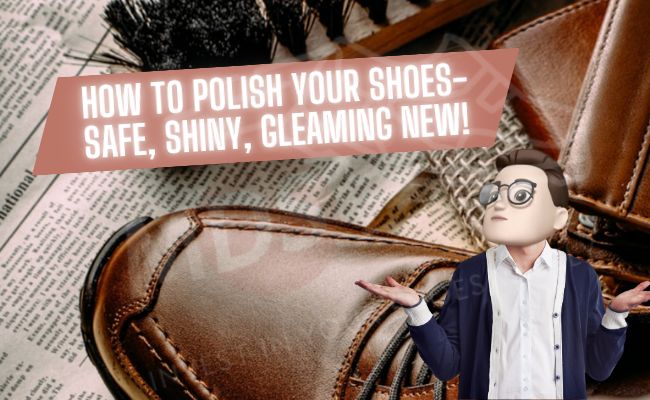
How To Polish Shoes?- Make Your Shoes Look New!!
I’ll admit it: I’m a total shoe nerd.
There’s something about slipping into a pair of freshly shined leather loafers or sturdy work boots that just feels right.
I remember, watching Michael Jackson perform the Black & White in his shiny black leather shoes and go WOWWW! For fun, I’d shine my leather shoes to perfection and try to imitate his steps. My love for MJ and this footwear helped me figure out how I should polish my shoes whenever they’d get dirty; for any good reason.
As I grew up, this became a weekly ritual. It takes ten to fifteen minutes, and gives me immense satisfaction and peace, also, making my Oxfords look gleaming new.
If you’ve ever felt worn down by scuffed‑up leather shoes or just want to give your favorite pair the care it deserves, read on.
I’ll walk you through the simple, step‑by‑step process for polishing your shoes.
Why You Should Bother Polishing Your Shoes?
Why are we even doing this?
Shoes aren’t cheap. Good leather shoes can easily run you hundreds of dollars. But unlike most things, shoes are one of the few products that actually get better with age, if you take care of them.
When you polish your shoes regularly:
- You nourish the leather (it’s literally skin, after all).
- You prevent cracks, dryness, and creases.
- You extend their lifespan by years, even decades.
- You make even a $150 pair look like worth a $1000.
- You turn heads, yes, people notice polished shoes.
Plus, there’s something almost therapeutic about polishing shoes. It’s like self-care, but for your feet.
Prepare Your Workspace and Gather the Right Tools
To polish your shoes, you need to sit down in a clean place, with ample light and your wax polish, cream polish, shoe color, shoe brushes, and microfiber cloth.
I like to sit at my kitchen table or near a window so I get good natural light. It really helps me see the true color and condition of the leather. I lay down some old newspapers or a cloth to catch any polish drips or dust.
The tools you’ll need:
Let’s not overcomplicate this. You don’t need to buy half of Amazon. Here’s exactly what I keep in my personal shoe polishing kit:
Shoe Polish
- Wax polish (for shine & protection)
- Cream polish (for nourishment & color touch-up)
- Get a color that matches your shoes. Or neutral, if you’re not sure.
My personal brands? Kiwi for basics. Saphir for high-end leather.
Brushes
- Horsehair brush (large): For cleaning and buffing.
- Small dauber brush: For applying polish into tough corners.
(Don’t cheap out here. A good brush lasts forever.)
Cloths
- Old cotton t-shirts cut into squares (perfect for applying polish).
- Microfiber cloth for final buffing.
Shoe Trees (Optional)
- Cedar shoe trees help hold the shoe’s shape.
- They also open up creases while you polish.
Leather Conditioner (Optional, but recommended)
- Use every few months to keep leather supple.
Toothbrush
- For those hard-to-reach areas (welts, stitching, edges).
Spray Bottle with Water
- For that military-level mirror shine.
Having the right tools ready makes the whole process smoother.
I always keep a small shoe care kit with me, so whenever I feel my shoes need some love, I’m ready. Trust me, polishing shoes is like a little ritual, a chance to slow down and treat your footwear with respect.
Remove the Laces and Give Your Shoes a Thorough Clean
Now that we’ve got our tools ready, it’s time to get to work.
Take the laces off. It might seem like a small detail, but it makes a world of difference. When the laces are out of the way, you can clean and polish the tongue and eyelets properly, which often get overlooked.
The first and often overlooked step in shoe polishing is cleaning. Polishing dirty shoes is like putting makeup over dirt; it never looks right and can damage the leather.
Now, grab your horsehair brush and start by brushing off any loose dirt and dust from the entire shoe, including the seams and soles if you want. Be gentle but thorough. I like to imagine I’m waking up the leather, clearing off the day’s grime to reveal its natural glow beneath.
If the shoes are really dirty or stained, dampen a cloth with a bit of leather cleaner or mild saddle soap and gently wipe the surface. Don’t soak the leather, just enough to remove stains. This is also a good time to wipe the soles and the heel.
Once cleaned, let your shoes dry naturally; never use direct heat or sunlight because it dries out and damages the leather.
I remember one incident in which I ignored this step because I was in a hurry. The result? The polish didn’t stick properly, and my shoes looked blotchy.
So, clean first, always!
Condition the Leather
Leather is a natural material, and like our skin, it can dry out, crack, and lose its luster without proper care. This is where conditioning comes in; it’s basically giving your shoes a nourishing facial treatment.
I take a soft cloth, apply a small amount of leather conditioner, and rub it into the leather in slow, gentle circular motions. Focus especially on areas that crease a lot, like near the toe box and around the ankle.
One time, I skipped this step because I was in a rush, and I could see tiny cracks starting to form after a few months. Conditioning regularly prevents this, keeps the leather flexible, and even helps with water resistance a bit.
After applying, I let the conditioner absorb for about 20 to 30 minutes. Sometimes I get distracted and leave it on longer, which is fine, but make sure the leather isn’t left sticky or overly oily.
Apply the Cream Polish with Careful, Circular Motions
Once the leather feels soft and nourished, it’s time to add some color and depth with cream polish. I use a cream rather than a wax polish for this stage because it penetrates the leather better and restores faded color.
Using a clean cloth or a small applicator brush, scoop a small amount of cream polish; you need less than you think. I usually start with a pea-sized amount for one shoe. Then, gently massage it into the leather using small circular motions. This helps the polish settle evenly and reach every nook and cranny.
Don’t rush this. Take your time to really work the polish into creases and folds. It’s like giving your shoes a deep dye treatment that enhances the richness of their color.
After applying, let the polish sit for about 15 to 20 minutes so it can soak in. You’ll notice the leather’s texture slightly smooth out, and the color looks richer.
Buff the Shoes with a Horsehair Brush
When the polish has settled, grab your horsehair brush again, this time for buffing.
Use quick, light strokes over the entire shoe. This will remove any excess polish and start building up a natural-looking shine.
Buffing is a little like massaging; it warms up the polish and leather, making them bond together. I always feel a sense of satisfaction watching my dull shoes gradually transform into something more vibrant and lively.
If you want, you can repeat the polish and buff step one more time for deeper color restoration.
Build the Gloss with Wax Polish and Water
If you want a mirror-like shine, wax polish is your secret weapon. After the cream polish stage, apply a thin layer of wax polish in the same circular manner.
But here’s a trick I picked up: keep a small drop of water handy (I use a spray bottle or just wet my finger) and lightly dampen the cloth or brush before applying wax.
The moisture helps the wax spread evenly and creates a smoother finish. After applying, buff again with the horsehair brush, then with a soft cloth for a final high-gloss shine.
Be patient, multiple thin layers of wax will build a shine that lasts longer and looks more natural than one thick coat.
Pay Attention to the Details (Edges, Stitching, and Soles)
Polishing isn’t just about the leather upper; the edges of the sole, the stitching, and the welt also affect how polished your shoes look overall.
Using an edge dressing pen or cream, carefully touch up scuffed or worn edges along the sole. This small detail sharpens the shoe’s overall look.
Also, clean the stitching lines with a small, soft brush; dirt can build up there and wear down threads over time, which nobody wants.
Re-lace or Replace the Laces
Put the laces back on carefully. Sometimes old laces look worn out and dull, so I keep a few pairs of fresh laces in my shoe care kit. Changing laces is a quick way to give your shoes a subtle but noticeable refresh.
Insert Shoe Trees to Preserve Shape
Once polished, I always pop in a pair of wooden shoe trees. They are like little guardians that keep the shoe’s shape intact and absorb any leftover moisture from wearing.
Shoe trees also help prevent creasing, which keeps your shoes looking newer, longer.
Store Shoes Properly and Rotate Them Regularly
Finally, storage is often overlooked, but it is very important. I store my polished shoes in cool, dry places away from direct sunlight, often inside breathable cloth bags to keep dust away without suffocating the leather.
Also, wearing the same pair every day is tough on shoes. I rotate mine so each pair gets a day or two to rest, which allows moisture to evaporate and the leather to breathe.
How Often Should You Polish Your Shoes?
My personal schedule:
- Daily office shoes: Lightly brush every Monday, full clean and polish every other weekend.
- Casual kicks: Wipe down after 3–4 wears; condition monthly.
- Special occasion shoes: Polish before each wear if possible; otherwise, monthly.
Adjust based on weather and usage. Rainy weeks call for extra conditioning. Hot, dry climates mean you’ll condition more often to prevent cracks. Always store with cedar trees immediately after wearing; moisture from your feet dries into the trees, not your shoes.
A quick weekly brush takes two minutes and keeps the dust off. Full rituals can be a Sunday morning treat.
Over time, you’ll find a cadence that fits your lifestyle.
Common Mistakes I Made & How You Can Dodge Them
When I started polishing my shoes, I honestly thought it couldn’t be that hard. Over the years, I’ve tripped over more than a few basic errors, each one costing me time, polish, and sometimes a cringe‑worthy finish.
Here’s what I learned the hard way and exactly how you can skip these stumbles.
1. Drowning the Leather in Polish
What I did: I once slathered an entire tin’s worth of cream polish onto a single Oxford in one go, thinking “more must be better.” Instead, I wound up with thick, cakey layers that flaked off in ugly patches.
How to avoid it: Use just a pea‑sized dab of cream polish. Work in thin, circular layers. If it looks dry, add another tiny dot; never glob it on all at once.
2. Using Wax on Suede
What I did: One afternoon, I tried to give my suede chukkas a quick shine with wax polish. The result? A stiff, patchy mess that looked worse than before.
How to avoid it: Suede and nubuck need special care, so don’t use creams or waxes. Stick to a dedicated suede brush, an eraser block for scuffs, and a protective spray.
3. Ignoring Conditioning
What I did: Thinking Polish alone would do the job, I neglected the conditioner. A month later, my dress shoes developed little cracks at the toe, which were embarrassing and preventable.
How to avoid it: Treat conditioner like sunscreen for leather. Apply a thin layer every two to three months (or sooner in dry climates), let it absorb for 15 minutes, and then polish.
4. Rushing Dry Times
What I did: Impatient to see results, I would layer cream and wax without waiting. The polish didn’t bond properly, leaving streaks and a blotchy finish.
How to avoid it: Respect the wait. Give cream polish 10–15 minutes to sink in, and wax about 8–10 minutes to set before buffing. It’s the secret behind that even, deep shine.
Every mistake I made taught me something new about shoe care. With these lessons in your pocket, you’ll avoid the same mistakes and get straight to a flawless shine, every single time.
Conclusion
As a fellow shoe lover, I can tell you: the little things add up. A well‑polished pair of shoes speaks volumes about your taste, your respect for quality, and the quiet confidence you carry into every room.
So keep your tools close, rotate your rotation of favorites, and treat shoe polishing as the art form it truly is.
Next time you step out, take a moment to admire the mirror‑gloss shine reflecting back at you. It’s not just a finish on leather, it’s a finish on hesitation, on neglect, and on anything that says you don’t have time for self‑care.
Lace up with intention, walk boldly, and let your polished shoes tell the world: you’re a shoe lover who knows how to shine.